Arcade Trackball Mouse Hack
Author: Wayne Eggert 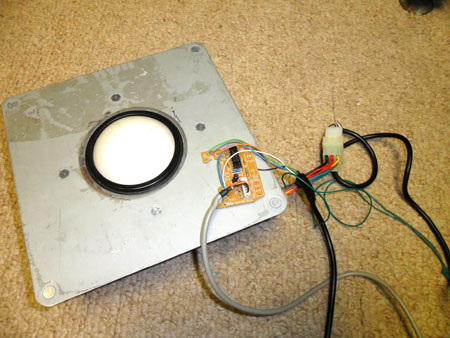
Date: 3/30/2011
Introduction
Why hook an arcade trackball up to a computer? I say, why not! Of course the real reason is that the ONLY way to play games like Centipede, Marble Madness or Golden Tee is with an arcade trackball! So if you're playing around with arcade emulators and get the notion to try hooking up all sorts of arcade controllers to your PC, you need a way to interface them easily with either pre-made or hacked hardware devices that your computer understands.
Options
There are some pre-made solutions available to hook an arcade trackball up to a computer that cost $15-20 and will allow you to easily connect your trackball to USB. You could also use a trackball specifically designed for the PC, but it will likely not be the same size or quality and the case its contained in may not make it easy to integrate into an arcade cabinet. You can also hack a mouse, as in this project -- it may take an hour or more of your time but you can re-purpose a crappy ball mouse that you would have otherwise just thrown out and save some money too!
Let's Hack A Mouse!!
So you want to hack a mouse, huh? It's not too difficult, but you will need some desoldering and soldering abilities if you want to do a nice job. Assuming you have those abilities or are willing to learn, it should only take a few hours or less. Depends how susceptible you are to Murphy's law when hacking stuff =)
Parts Needed
- Soldering Iron
- Desoldering Iron or Desoldering Tool(s)
- Wire cutters / Scissors
- Old Ball-style Mouse
- Small needlenose pliers
Optional (if you don't want to cut the molex connector off of the trackball and instead built your own wire harness on the mouse that mates with the trackball's connector)
- 6-pin Molex Receptacle 03-09-1061
- 0.093 female molex pins
- Wire(s) for wire harness (old network cable or phone cord should do fine)
Step 1: Find Mouse "Victim" & Disassemble
Any mouse should work fine -- it can be a PS/2 style or USB mouse. Also you don't HAVE to use a ball mouse from what I understand, but the steps would be slightly different than outlined here. So with that said, lets assume you have an old ball mouse, either USB or PS/2 similar to below. Locate and remove the screws on the bottom and open up the case.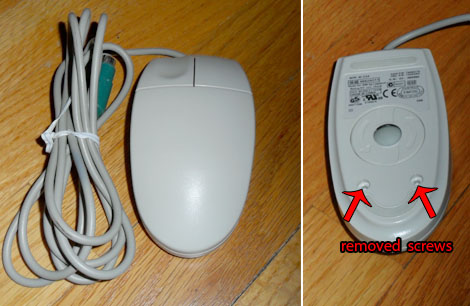
Picture: Standard ps/2 ball mouse
You should see something like below -- the "guts" of the mouse. Good thing this isn't a real mouse, the guts would look a little different and there wouldn't be much to hack wires into. Do not hack a real "live" mouse, especially not the cute ones.. they don't go back together easily.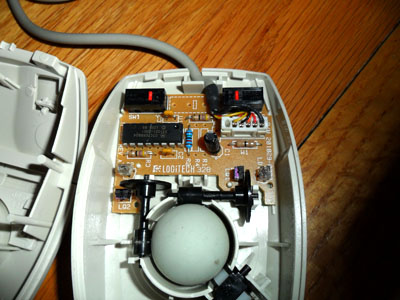
Picture: Inside "guts" of the Mouse
Now might be a good time to take note of the rollers and how they function when you move the mouse forward, backward and side to side. In the picture above, the roller on the right-hand side of the board is for the verticle axis and the roller on the left-hand side is the horizontal axis.. which I determined by visual inspection and actually moving the mouse in different directions.
Step 2: Identify Components
Next, identify the components that make up the mouse optics. This is where the wires for the horizontal and vertical phases will be hacked into. These components are the infared led (TX) indicated by the red arrows in the picture below, and the infared receiver (RX) indicated by the blue arrows. There are a pair of these, one for the horizontal axis and one for the vertical axis. 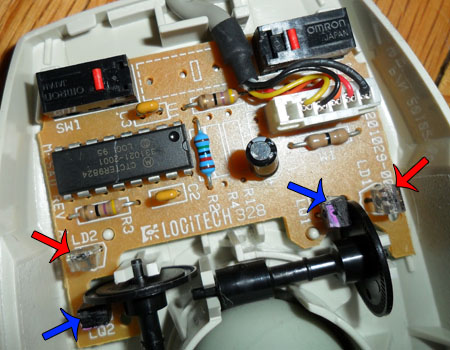
Picture: Infared LED (TX - red arrow) and Receiver (RX - blue arrow)
When you roll the mouse, the wheels (which have tiny slots in them) move
and the beam from the infared led is interupted slightly. Depending on
how fast this beam is broken & connected, the IC microcontroller on
the board knows how fast the mouse is being moved vertically or
horizontally. We are going to remove these components since the trackball has its own optical sensors that output the position/speed of the trackball. We will then hack the trackball outputs into the mouse.
Step 3: Remove Circuit Board
Next, remove the rollers and board from the mouse. You may wish to keep some of this stuff for future projects, since the plastic mouse "case" can be used to store a project or possibly be used as the body of a robot or vehicle.
Step 4: Desoldering Components
I won't go into how to desolder here as there are many methods, but if you are doing a lot of electronic projects it's best to have a professional desoldering gun. If you're only doing a few electronic projects, you could get by with cutting the components off the board & using a soldering iron to remove the remaining component legs from the board.
Below you'll see that I removed the infared LED & receiver from the bottom section of the board and also the switches at the top of the board. You don't *have* to remove the buttons, but I figured I could save them for another project. You also have the ability to hook wires up to where the buttons used to go to wire the mouse buttons to the trackball case or somewhere else on your cabinet. Some people modify their trackball case and put the buttons right on the case.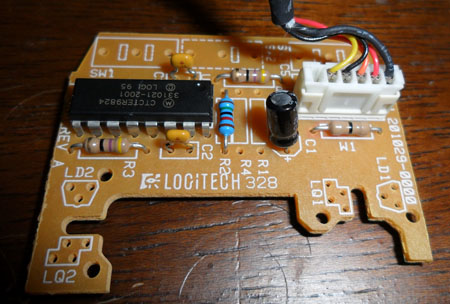
Picture: Circuit board removed; Components desoldered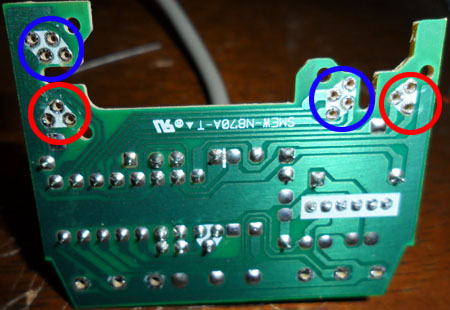
Picture: Bottom of the board showing desoldered components
Now to identify the connection points..
Comments:
| RE: Where can I buy a hacked mouse |
| Posted 08/17/11 4:44PM by AceBHound |
| You might be interested in an "OptiPac" from Ultimarc for around $39. That would allow you to hook up your arcade trackball wires directly to the terminal block connections on the OptiPac and if your trackball had a slightly different wiring configuration you'd be able to swap wires easily. |
| Where can I buy a hacked mouse |
| Posted 08/13/11 8:39AM by Anonymous Techdoser |
| Where can I purchase a pre-hacked mouse? |
